
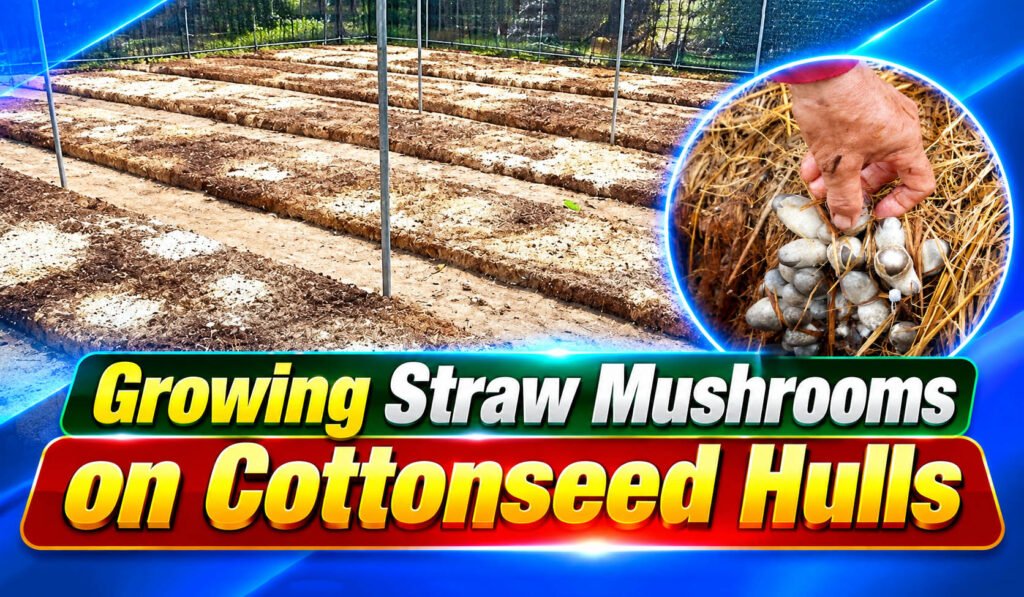
Growing Straw Mushrooms on Cottonseed Hulls: Outdoor & Indoor
Straw mushrooms can be grown on cottonseed hulls in two main ways: outdoors and indoors. Each method has its own technical requirements, temperature thresholds, and moisture levels that need to be followed closely to get a high yield. In this guide, VNmushrooms Farm walks through each effective method for growing straw mushrooms on cottonseed hulls in detail.
Author: Võ Quang Nam — Edible & Medicinal Mushroom Specialist. Content Advisor at VNmushrooms Farm.
The methods for growing straw mushrooms on cottonseed hulls are summarized by VNmushrooms Farm in Table 1:
| Method Group | Format | Key Features |
| Outdoor | Single-crop growing | A dedicated growing area; build beds with an arched frame, covered with plastic sheeting and straw. |
| Outdoor | Intercropping in cotton fields | Makes use of the cotton field; the cottonseed hull substrate is mixed and fermented. |
| Outdoor | Intercropping in forests | Dig beds to match the spacing between tree rows; lay the substrate in a wave pattern. |
| Outdoor | Intercropping in sugarcane fields | Lay the material between sugarcane rows; use an arched frame, plastic sheeting, and straw as cover. |
| Indoor | Growing on shelves | Fermented substrate is moved indoors and laid in a wave pattern or spread flat on the shelves. |
Table 1: Methods for growing straw mushrooms on cottonseed hulls.
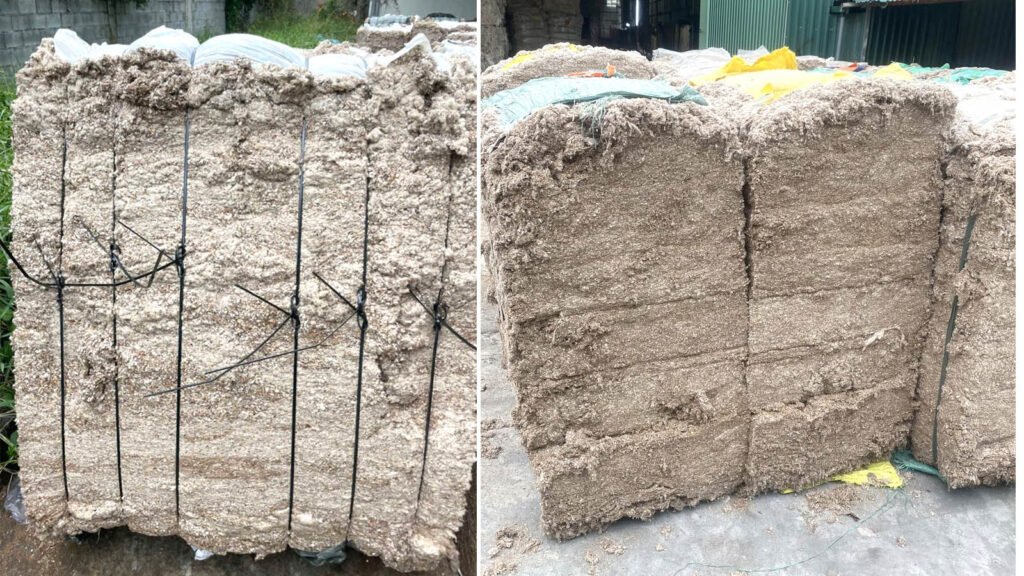
Growing Straw Mushrooms on Cottonseed Hulls Outdoors
When growing straw mushrooms outdoors on cottonseed hulls, you can set up a dedicated growing area or intercrop with other crops to boost production and save space.
There are 4 ways to grow straw mushrooms on cottonseed hulls outdoors: single-crop growing, intercropping in cotton fields, intercropping in forests, and intercropping in sugarcane fields. These approaches differ mainly in growing space, how the beds are built, and how temperature and moisture are managed.
Read more: 10 High-Quality Straw Mushroom Strains: Selection Guide
Straw Mushroom Farming: Single-Crop Growing on Cottonseed Hulls
Step 1: Prepare the Area and Build the Beds
| Item | Specification |
| Bed orientation | East–west |
| Bed width | 1 m (length depends on the plot) |
| Ditch around the bed | Dig suitable irrigation/drainage ditches; the outer perimeter ditch is dug deeper |
| Arched frame | Bamboo or branches, secured with bamboo/wood stakes, 0.7–0.8 m tall, covered with plastic sheeting, with soil packed tightly around the edges |
The growing area for straw mushrooms needs good ventilation, easy water supply, easy drainage, and fertile sandy loam soil rich in organic matter.
Clear out weeds, till the soil until loose, and spray concentrated lime water to kill pests in the soil.
Build the beds east–west, 1 m wide, with length depending on the plot. Dig ditches of a suitable size around each bed for easy irrigation and drainage, and dig a deeper perimeter ditch around the outside of the growing area.
Over each bed, use bamboo or branches to make an arched frame, secured on both sides with bamboo or wood stakes to a height of 0.7–0.8 m. Cover the top with plastic sheeting and pack soil tightly around the edges to hold it in place.
Step 2: Lay the Substrate and Inoculate
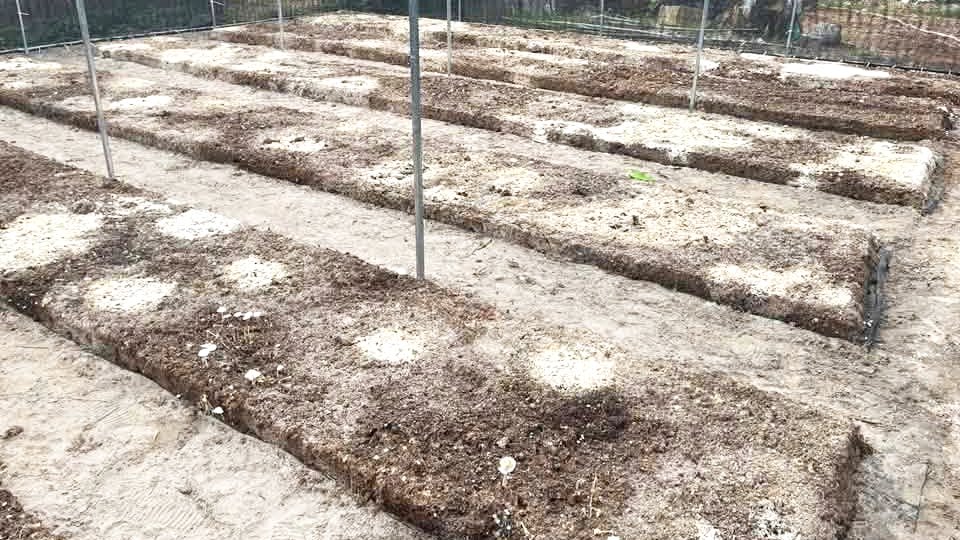
Move the moistened or fermented cottonseed hulls onto the bed and spread them in a wave pattern, each wave about 30 cm wide and 12–14 cm tall (adjustable depending on temperature), with the groove at the bottom about 1–1.5 cm deep.
The typical spawn rate is 2–3 bottles per square meter. You can inoculate in layers, mix it in, or inoculate in pockets, but the top layer should get more — about 50%.
Then cover with plastic sheeting, and add straw over the top of the small frame to hold in moisture and heat.
Step 3: Control Temperature and Ventilation
| Temperature Threshold | Value |
| Temperature inside the material | No higher than 40°C |
| Temperature on the material surface | No higher than 36°C |
| In cool weather | Retain as much heat as possible; don’t let it drop below 30°C |
| First 3 days after inoculation | Monitor temperature changes constantly |
| Ventilation | After 3–5 days, gradually increase airflow; typically open the 4 corners of the plastic sheeting about twice a day, for roughly 1 hour each time |
On sunny days, around 10 a.m., open the straw curtain to let sunlight hit the plastic sheeting and warm the bed, then around 4 p.m., cover it back up with the straw curtain to keep the warmth in. On cloudy or windy days, don’t open the straw curtain.
In hot weather, the bed needs to be cooled appropriately (never open the curtain at midday) — open it only in the early morning and early evening for light ventilation or moderate cooling.
Always make sure the temperature inside the material doesn’t exceed 40°C and the surface temperature doesn’t exceed 36°C. In cool weather, retain as much heat as possible and don’t let it fall below 30°C.
After inoculation, especially during the first 3 days, monitor temperature changes closely. Check the temperature every day and adjust ventilation accordingly; after 3–5 days, gradually increase airflow. Typically, open the 4 corners of the plastic sheeting for ventilation about twice a day, for roughly 1 hour each time.
Step 4: Watering and Applying the Casing Soil
After 5–7 days, once the mycelium has fully colonized the bed, apply a casing layer of clean, fertile garden soil 1–1.5 cm thick. The soil’s moisture level should be right when it holds together in a clump when squeezed and crumbles when released.
After casing, keep the plastic sheeting over the soil; once the mycelium grows up into the soil layer, open the sheeting. The plastic sheeting and straw curtain on the small frame stay in place.
When the mycelium starts to form clumps (pinning), switch to fruiting management. During fruiting, adjust temperature and hold moisture appropriately. Generally, don’t water the surface directly — especially while the pinheads are small — and instead supply water mainly through the ditches to keep the soil moist, letting the substrate draw in water to support fruiting body growth.
Adjust ventilation based on the mushrooms’ growth rate and temperature swings to maintain the right heat and humidity conditions for fruiting body formation and development.
Step 5: Harvesting
When harvesting straw mushrooms, reach in by hand under the frame to pick them — never lift the straw curtain or plastic sheeting to harvest.
After the first flush has been harvested, remove any debris from the surface and apply one heavy watering (water temperature around 32°C). Keep holding in warmth and moisture so the second flush can form.
Straw Mushroom Farming: Intercropping in Cotton Fields
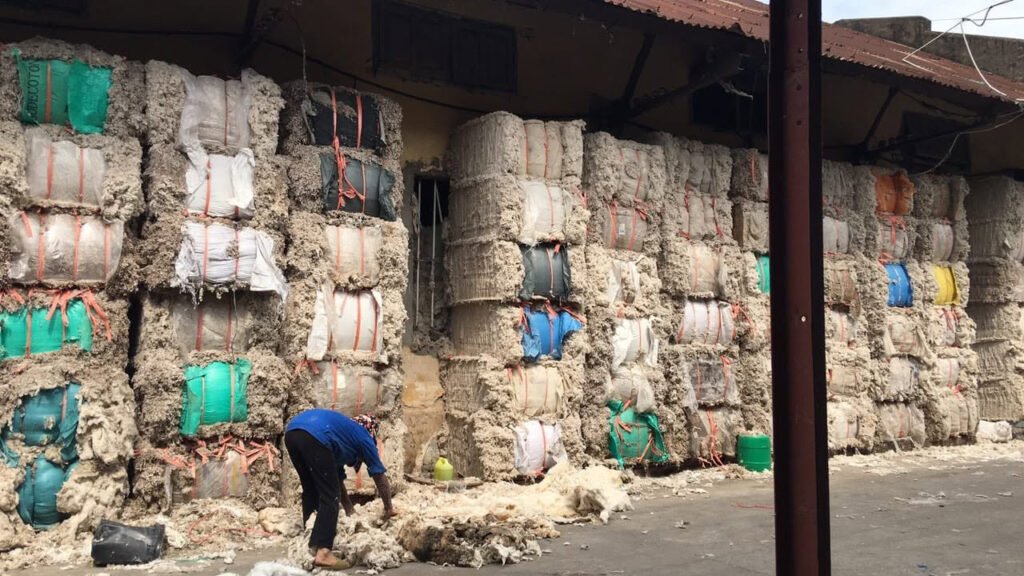
Cotton-growing regions usually have plenty of cottonseed hulls, so cottonseed hulls make the main substrate for growing straw mushrooms there. You can grow straw mushrooms on cottonseed hulls using this substrate formula: cottonseed hulls 94%, lime 3%, superphosphate 0.5%, KMnO₄ 0.2%, water ratio 1:1.3–1.4.
Then follow these steps from VNmushrooms Farm to intercrop straw mushrooms in a cotton field:
Step 1: Ferment the Substrate
Pile the material to ferment for 2–3 days; the pile should reach about 65°C, and should be turned once a day so the material ferments evenly. After fermentation, spread the material out to cool to 35°C, then lay it out in beds at 10–15 kg per square meter (dry-weight basis), shaped like a tortoise shell.
Step 2: Inoculate the Spawn
Inoculate in layers: the first and second layers each take 25% of the spawn, and the third layer takes 50%.
If you have more spawn, you can increase the amount used accordingly. After inoculation, press the surface down lightly, cover with plastic sheeting, then add a layer of straw for shade.
Step 3: Manage the Mycelium and Temperature
During mycelium growth, especially the first 3 days, monitor the substrate temperature; if it exceeds 36°C, open the sheeting to bring it down.
In unfavorable weather, take care to keep it warm. Typically, the mycelium fully colonizes the substrate 5 days after inoculation. Once the mycelium has covered the surface, add a layer of fine soil about 1 cm thick, then spray the surface with 0.1%–0.3% lime water.
About 2–3 days after casing, tiny needle-like pinheads appear; at this point, air humidity needs to be held at 85%–90%.
In the early stage, don’t water the mushrooms directly; later on, if air humidity is low, you can mist twice a day, using water close to air temperature (around 32°C) and avoiding spraying the pinheads directly.
Step 4: Harvest and Mycelium Recovery
Harvesting can begin 3–5 days after the elongation stage starts. After the first flush, stop watering for 2–3 days to let the mycelium recover, then give one heavy watering to prepare for the next flush.
In rain or storms, cover the beds promptly to prevent weather damage. The straw mushroom season typically ends before the cotton harvest.
Straw Mushroom Farming: Intercropping in Forests
To grow straw mushrooms on cottonseed hulls between trees in a forest, dig mushroom beds along the spacing between tree rows, 80–100 cm wide and 10 cm deep, and mound the excavated soil on both sides to form ridges about 10 cm high. Before inoculating, spray the beds and the surrounding area with 5% lime water.
The main growing material is cottonseed hulls. Use this substrate formula: cottonseed hulls 94%, lime 3%, superphosphate 0.5%, KMnO₄ 0.2%, water ratio 1:1.3–1.4. For the fermentation method, refer to the section on intercropping in cotton fields above.
After fermentation, spread the material into the beds in a wave pattern, with each wave crest about 15 cm high and 3 crests per meter of length. Then scatter the spawn over the surface, press down lightly, cover with plastic sheeting held down with bricks, and add straw over the top.
During the first 3 days of mycelium growth, pay special attention to the material’s temperature to avoid overheating, which can kill the spawn. Generally, the material’s surface temperature shouldn’t exceed 39°C; if it gets too high, open the sheeting to ventilate and bring the temperature down, or water the straw covering to cool it.
When ventilating, be careful not to let the material lose too much moisture. After 4–5 days, once the mycelium has covered the material, spread a layer of fine soil about 1 cm thick over the surface, then spray with 0.3% lime water. If the soil around the bed dries out, water it so it doesn’t pull moisture away from the straw mushroom bed.
Fruiting bodies form 2–3 days after casing; at this point, lift the plastic sheeting to make fruiting easier. During fruiting, hold air humidity at 85%–90%. In rain or cold weather, take prompt measures to retain warmth, such as covering with straw, to prevent temperature drops that kill the mushrooms.
Straw Mushroom Farming: Intercropping in Sugarcane Fields
To grow straw mushrooms on cottonseed hulls between sugarcane rows, first clear the sugarcane field: strip away the yellow leaves and some of the green leaves at the base of the cane, pull out unproductive side shoots, weed, and hill up the base of the cane to prevent lodging.
Level the surface of the bed, then spray 2% lime water mixed with the insecticide dichlorvos to kill insects in the soil.
The main growing material is cottonseed hulls. Use this substrate formula: cottonseed hulls 94%, lime 3%, superphosphate 0.5%, KMnO₄ 0.2%, water ratio 1:1.3–1.4. For the fermentation method, refer to the section on intercropping in cotton fields above.
The pile should reach about 65°C and ferment for 2–3 days, turned once a day so the material ferments evenly. After fermentation, spread the material between the sugarcane rows, scatter the spawn over the top, add a layer of fine soil about 1 cm thick, then build a small arched frame from bamboo, cover it with plastic sheeting, and add straw over that.
During the first 3 days after inoculation, monitor the material’s temperature regularly to prevent overheating; if the surface temperature exceeds 36°C, open the sheeting promptly to ventilate and cool it.
After inoculation, you can water the straw covering 2–3 times a day to help cool things down and hold moisture. When picking the mushrooms, there’s no need to open the entire covering — just open the plastic sheeting enough to reach in by hand. After harvesting, press the covering down firmly with soil or bricks to cut down on water evaporation.
Growing Straw Mushrooms on Cottonseed Hulls: Indoor Method
Using cottonseed hulls to grow straw mushrooms indoors delivers not only high yield but also fairly consistent quality. Sterilizing the grow room and fermenting the cottonseed hull material follow the same approach as outdoor growing on cottonseed hulls.
Read more: High-Yield Techniques for Growing Straw Mushrooms on Rice Straw Indoors.
VNmushrooms Farm walks through growing straw mushrooms on cottonseed hulls indoors in the following steps:
Step 1: Prepare the Growing Material
Once the material has fermented, spread it out briefly to cool it down, then move it into the grow room, with the material’s pH held at around 8.
On the growing shelves, lay down a sheet of plastic, then add the material, arranging the cottonseed hulls in a wave pattern or spreading them flat.
Typically, a 1 m-wide bed can hold 3 wave rows, with wave height of 12–14 cm and groove depth of 1–1.5 cm. If spread flat, the layer should be about 10–12 cm thick. In hot weather, you can reduce the material’s thickness. After spreading, press the surface flat.
Step 2: Inoculate and Manage Temperature
Once the material’s temperature drops to 32–35°C, inoculate with spawn at about 2–3 bottles per square meter.
After inoculation, cover the top with clean newspaper (ideally sun-dried for 2–3 days beforehand), then cover with plastic sheeting.
Typically, within 24 hours the mycelium begins to germinate. Because the material hasn’t fully finished fermenting, the temperature is usually quite high in the first 1–2 days, so monitor temperature changes closely and try to keep the material below 40°C.
If the grow room gets too hot, open the sheeting frequently to release heat, and mist water to cool the air in the room and around the walls. If the room temperature falls below 25°C, add heat — ideally keeping it no lower than 28°C.
Under normal conditions, the mycelium covers the bed surface after 5–7 days. At that point, remove the newspaper; you can add casing soil or skip it.
Step 3: Fruiting and Harvest
Once the mycelium in the soil layer has fully colonized it, raise air humidity to 85%–90%, but never mist the fruiting bodies directly, especially while they’re still small.
During fruiting, ventilate several times a day to prevent deformed mushrooms. During the fruiting period, hold the grow room temperature at around 30°C to keep mushroom quality high.
When the material needs extra water, use water at about room temperature and apply it as a fine mist.
After the first flush is harvested, clean the bed surface and water the material thoroughly; if the pH falls below 8, you can water with lime water, then re-cover with plastic sheeting and wait for the second flush to appear before opening the sheeting again.
Whether you grow straw mushrooms on cottonseed hulls outdoors or indoors, the factor that affects quality and yield throughout is the same: controlling the temperature and humidity of the growing environment.
Cottonseed hulls are one of the substrates that deliver high economic returns for growing straw mushrooms. You can also readily use other local agricultural byproducts to grow straw mushrooms, such as:
- Growing straw mushrooms on rice straw.
- Growing straw mushrooms on cotton waste.
- Growing straw mushrooms on corn stalks (cobs).
- Growing straw mushrooms on sugarcane bagasse.
- Growing straw mushrooms on soybean stalks.
- Growing straw mushrooms on wheat straw.
- Growing straw mushrooms on mixed materials.
- Growing straw mushrooms on cottonseed hulls.
The VNmushrooms Farm engineering team will walk through the growing process for each of the methods above in upcoming guides. Growers need to master the mixing formulas and technical thresholds — following the process correctly leads to high yield and good quality when growing straw mushrooms.
- Growing Straw Mushrooms on Cotton Waste: Outdoor & Indoor
- High-Yield Straw Mushrooms, Part 3: Inoculation Rooms & Spawn Run
- Straw Mushroom Farming: Low-Cost, High-Return Business
- High-Yield Straw Mushrooms, Part 8: Spawn Quality & Storage
- Growing Straw Mushrooms on Cottonseed Hulls: Outdoor & Indoor
Bài viết cùng chủ đề:
-
Growing Straw Mushrooms on Cotton Waste: Outdoor & Indoor
-
10 High-Quality Straw Mushroom Strains: Selection Guide
-
High-Yield Straw Mushroom Growing: Part 9 – Setup & Disinfection
-

High-Yield Straw Mushrooms, Part 8: Spawn Quality & Storage
-

High-Yield Straw Mushrooms, Part 7: Grade II & III Spawn
-
High-Yield Straw Mushrooms, Part 6: Mother Spawn Production
-
High-Yield Straw Mushrooms, Part 5: Common Chemicals Used
-
High-Yield Straw Mushrooms, Part 4: Heating, Humidity & Tools
-
High-Yield Straw Mushrooms, Part 3: Inoculation Rooms & Spawn Run
-
High-Yield Straw Mushrooms, Part 2: Spawn Sterilization Equipment
-
Straw Mushroom Growth Stages: When to Harvest for Best Yield
-

Straw Mushroom Farming: Low-Cost, High-Return Business